Probe Design and In Vitro Validation Quick Start Guide
Near-infrared Dye Labeled Targeting Agents and Optical Imaging
You probably know that fluorescently labeled targeting agents and optical imaging are effective for monitoring disease progression and evaluating treatment efficacy in animals. Near-infrared (NIR) labeled targeting agents are valuable for non-invasive, longitudinal study of disease (including tumorigenesis and metastasis). A properly developed NIR-labeled targeting agent can even enable preclinical study of therapeutic effects, pharmacokinetics, and pharmacodynamics of drug-target interactions.
But what does "properly developed" mean? How do you even get started if the possibilities and complexities of developing a probe are completely new to you?
The goal of this guide, and the other three guides in this series, is to help you with the basic questions you need to answer when confronted with the task of developing an optical probe. Each guide tackles a specific segment of the process, and resources are linked at every step for further exploration.
To get started, here are the main phases of the probe development process and the guides that introduce each phase.
Probe Design and In Vitro Validation (licor.com/probe_design_guide)
In Vivo Validation of Optical Probes (licor.com/in_vivo_guide)
Ex Vivo Validation of Optical Probes (licor.com/ex_vivo_guide)
You'll need an understanding of sterile technique and cell culture to conduct the research described in this guide.
Introduction
An optical probe consists of a targeting compound attached to an NIR Dye.
The dye must be covalently bound to the targeting compound. The degree of difficulty required to label your targeting compound is directly related to the targeting compound's inherent physical characteristics, such as molecular weight, amino acid composition, and solubility.
After labeling the targeting compound, the unconjugated (free) dye must be separated from the labeled targeting agent. You can then validate the targeting agent in vitro. Before using the dye in vivo, you must determine an appropriate dye-to-protein ratio and concentration.
In this section, we will explain how to choose a targeting compound and a dye, and the basic steps required to prepare the targeting agent for use.
For more in depth information regarding probe development, read A Systematic Approach to the Development of Fluorescent Contrast Agents for Optical Imaging of Mouse Cancer Models (licor.com/probe_white_paper).
Choose a Targeting Compound
A targeting compound must specifically bind a cell surface receptor, transporter, or other protein. Example targeting agents include antibodies, small molecules, peptides, sugars, and drugs.
Choose a Dye
A dye in the NIR range (700 - 800 nm) will yield the best results in vivo due to low autofluorescence from animal tissues. Light is absorbed by endogenous fluorophores, such as hemoglobin, melanin, and lipids. The effects of light absorption and scattering decrease with increasing wavelength.
In addition, most NIR clinical imaging takes place at 800 nm.
IRDye® 800CW and 680RD have been used in tandem for in vivo imaging (Near-infrared-labeled Tetracycline Derivative Is an Effective Marker of Bone Deposition in Mice, licor.com/bonetag_paper). See licor.com/irdye for more details regarding IRDye Infrared Dyes.
Label Your Targeting Compound
Antibodies and small molecules are the most commonly used targeting compounds, and there are different considerations for labeling each.
Label an Antibody
Antibodies are relatively straightforward to label, and kits for labeling antibodies are commercially available. LI-COR provides kits for labeling antibodies (licor.com/label_kits).
The following chemistries can be used to label antibodies:
Primary amine labeling (lysine residues) with IRDye NHS esters
The NHS ester labeling process is described in more detail here (licor.com/800cw_labeling).
Sulfhydril labeling (cysteine residues) with IRDye maleimides
The maleimide labeling process is described in more detail here (licor.com/maleimide_labeling).
After synthesis, the labeled antibody is separated from unconjugated dye, typically via size exclusion spin columns.
Label a Small Molecule
Small molecules are more challenging to label than antibodies, primarily because intensive purification is required to separate the labeled targeting agent from unconjugated dye. High pressure liquid chromatography (HPLC) and fast protein liquid chromatography (FPLC) are often used for this purification. Failure to sufficiently purify the labeled targeting agent can result in high background.
Small molecule probes clear the body rapidly. When using a small molecule probe, ensure your experimental parameters are adjusted so that the probe will be retained adequately for imaging. See In Vivo Validation of Optical Probes
(licor.com/in_vivo_guide) for more on this topic.
Characterize Labeled Targeting Agent In Vitro
Before beginning an animal study, it is critical to verify specificity of your labeled targeting agent (Aquilar et al in PLoS One 2010).
Cell-based assays can be a convenient way to evaluate targeting agent specificity in vitro. Although success in a cell-based assay does not guarantee success in vivo, failure is generally predictive of failure in the animal.
In Vitro Probe Characterization with On-Cell Western and In-Cell Western Assays
The On-Cell Western and In-Cell Western are cell-based assays that can help you characterize the selectivity of your targeting agent.
The On-Cell Western was developed to characterize optical probes. Live cells are targeted with an optical probe against extracellular protein domains (e.g., receptors or transporters), which allows fluorescent detection of the expression state of the cell environment.
With the On-Cell Western, you can incorporate blocking and competition to determine affinity of the optical imaging agent to its target. You can also determine the probe's location (intracellular or extracellular), if you follow up the On-Cell Western with NIR microscopy.
- The In-Cell Western Assay is used to detect antigens inside fixed, permeabilized cells.
These high throughput assays provide a quick and effective way to understand targeting agent activity.
Getting Started with On-Cell Western and In-Cell Western Assays
Although the On-Cell Western and In-Cell Western Assays are different, there are some common points to consider before getting started.
Materials and Instrument Settings
Using the right plate is critical. Among other considerations, the color of the plate is important.
Do not use white plates! Autofluorescence from white plates leads to high noise in your images.
For a list of recommended plates and advice on choosing the right settings to image your plate, read the Plate Selection and Instrument Settings page (licor.com/bio/accessories).
Antibody Validation
Antibodies must be validated via Western blot before use.
Because proteins are not separated via electrophoresis in these cell-based assays, antibodies must be validated in Western blots to ensure that there are no non-specific interactions.
The validation phase is a good opportunity to determine the optimal time point for cellular response. Without finding the optimal time, you may underestimate the response or miss the response altogether.
More information about antibody validation is available in the In-Cell Western Antibody Validation Tech Note (licor.com/icw_antibody_guide).
Z'-Factor Analysis
Before using an In-Cell Western or On-Cell Western assay to characterize targeting agent activity, you can determine the overall quality and reliability of the assay using a Z'-Factor assay. An In-Cell Western Z'-Factor Assay is an In-Cell Western Assay with just background, negative control, and positive control wells.
The Z'-Factor statistic provides a way to evaluate whether or not assay conditions are optimized. The Z'-Factor is a dimensionless value that represents the variability and dynamic ranges between two sets of sample control data.
You can read up on the Z'-Factor analysis in the Z'-Factor Tech Note (licor.com/zfactor) or the Z'-Factor White Paper (licor.com/zfactor_app_note).
In-Cell Western
This section is general. For a specific example of an In-Cell Western at work, read (licor.com/icw_kinase).
Well Setup
- Background wells are not incubated with primary antibody. These wells are used to identify non-specific secondary antibody binding.
- Negative controls are incubated normally with primary and secondary antibodies, but do not receive treatment.
- Positive controls are incubated normally with primary and secondary antibodies, and receive the appropriate treatment to elicit the maximum desired response.
Protocol
This procedure should not be used to characterize a targeting agent until the antibodies have been validated (see above). It is also advisable to conduct a Z'-Factor assay (see above).
Prepare cell culture in 96 or 384 well microtiter plates.
Grow cells until they reach adequate confluency. The Seeding Cells Tech Note (licor.com/seed_cells) and Frequently Asked Questions About Suspension Cells (licor.com/suspension_cells) can help get you started.
Apply your treatment (e.g. chemical inhibitors, stimulants, or drugs) to induce a response.
Remember to use different positive and negative controls, and to replicate your controls.
Rinse, fix, and permeabilize cells, as described in the In-Cell Western Fixation/Permeabilization Tech Note (licor.com/icw_fix_cells).
Incubate with primary antibodies.
Normalization can be performed using validated reference proteins (tubulin, actin, etc.), total protein staining with IRDye NHS ester, or DNA staining with agents such as CellTag 700, Draq5, or TOPRO-3.
Rinse, incubate with IRDye secondary antibodies, and rinse again.
Be sure to choose secondary antibodies from an appropriate host species.
Scan the plate on an Odyssey CLx and use Image Studio Software for analysis.
On-Cell Western
This section is general. For more detail, read this On-Cell Western Protocol
(licor.com/ocw_guide).
Protocol
Prepare cell culture in microtiter plates.
Grow cells until they reach adequate confluency.
Prepare serial dilutions of the labeled targeting agent.
Including multiple concentrations will allow you to determine the most effective concentration.
Apply your treatment (e.g. chemical inhibitors, stimulants, or drugs) to induce a response.
Remember to use different positive and negative controls, and to replicate your controls.
Prepare labeled targeting agent for incubation and detection of a cellular or receptor response, with or without unlabeled blocking or competitive agents.
This process is conducted on live cells, so healthy cell culture is critical.
Rinse and fix cells.
Permeabilization may be necessary for the chosen normalization method.
Incubate with chosen normalization agent.
Normalization can be performed using validated reference proteins (tubulin, actin, etc.), total protein staining with IRDye NHS ester, or DNA staining with agents such as CellTag 700, Draq5, or TOPRO-3.
Scan the plate on an Odyssey CLx and use use Image Studio Software for analysis.
In-Cell Western and On-Cell Western Image Analysis
The In-Cell Western Analysis key for Image Studio allows you to quickly analyze In-Cell Western and On-Cell Western Assays.
After the In-Cell Western Analysis Key is installed, you can easily designate which wells are which type. Once you have designated the well types, Image Studio will calculate a response to treatment for your sample wells. With that response value, you can calculate the following common parameters:
- EC50
- IC50
- Kd
- Ki
Once you have installed the In-Cell Western Analysis key, the actual analysis in Image Studio can be divided into 3 steps.
To learn how to perform an In-Cell Western Analysis in Image Studio, see the In-Cell Western Analysis Software Guide (licor.com/icw_guide).
Apply the Analysis
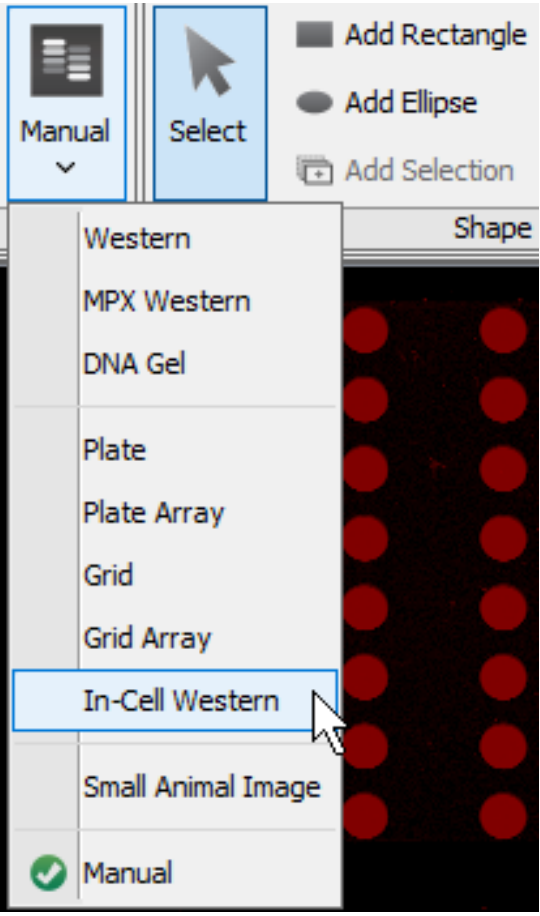
Open the image you want to analyze in Image Studio.
Click the Analysis tab and set the Type group to In-Cell Western.
Step 1. Complete the Analysis
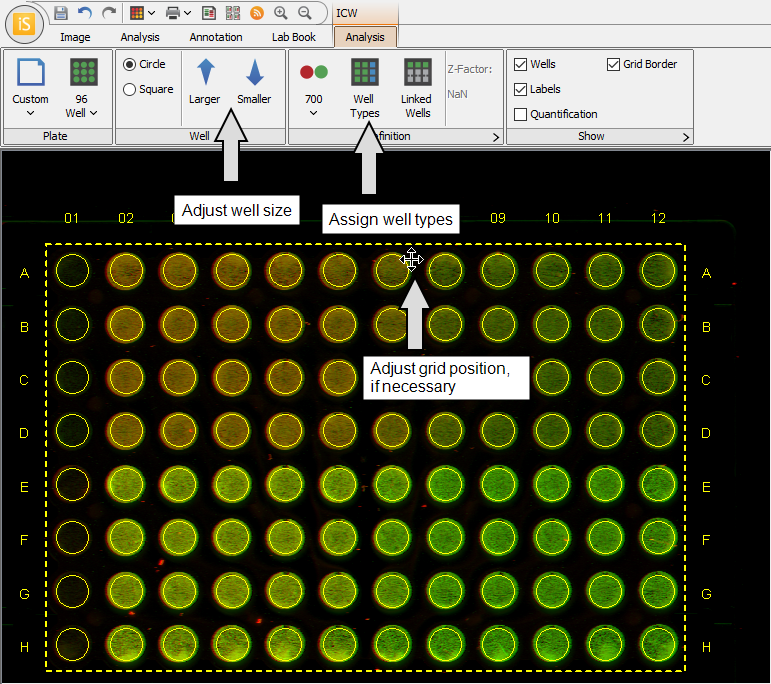
Select a well size in the Plate group.
Refine the grid's position until shapes overlap wells. Use Larger/Smaller to adjust well size.
Click Well Types and designate wells as Background, Sample, or 100% Standard.
Step 2. Export Data to Spreadsheet or Lab Book
There are several export options.
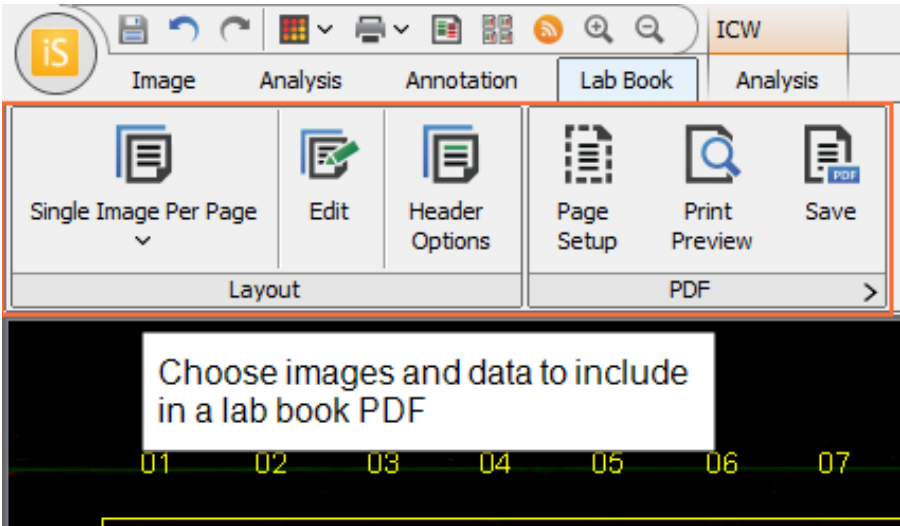
To export a Lab Book PDF, open the Lab Book tab and choose the data and images to export.
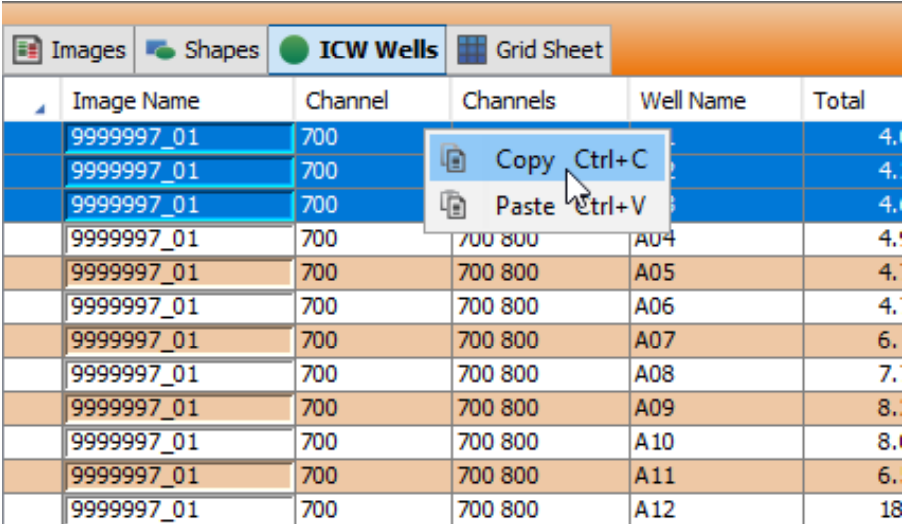
Copy data from the ICW Wells or Grid Sheet Table to a spreadsheet program.
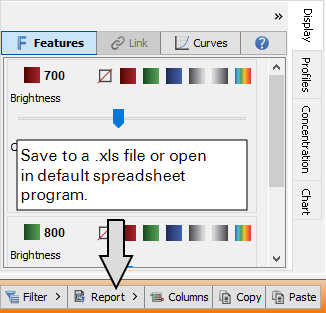
- To export data to a spreadsheet, click Report.