Release Notes
Version 2.2 is the latest version of LI‑COR® Acquisition Software.
A bug has been resolved that prevented some changes to Collections in earlier versions of LI‑COR Acquisition Software from being saved.
LI‑COR Acquisition Software version 2.1 supports the incredibly fast and flexible Odyssey® F Imagers! Visit licor.com/bio/odyssey-f to learn how you can advance your research with high-quality images from the Odyssey F.
In further exciting instrument news, LI‑COR Acquisition Software version 2.1 now provides an additional channel for the Odyssey M Imager: the 700A. The 700A channel has an excitation wavelength of 685 nm and an emission range of 816 – 840 nm. Are you already using the Odyssey M with a previous software version? Simply connect to your Odyssey M using LI‑COR Acquisition Software version 2.1 to use the 700A channel in the Custom scan workflow.
A Scan button
and an Image Gallery button have been added next to the Home button at the top left of the LI‑COR Acquisition window. Click the Scan button to jump to the Connect page to start a scan. If you're on the Image Gallery, you now can click the Scan button instead of first going Home and then clicking Scan. Click the Image Gallery button to navigate to the Image Gallery.
The Leave button on the Scan page has been renamed to Home to clarify that you will return to the Home page when you click the button.
A bug has been fixed that sometimes caused errors when new channels were added after starting a scan workflow with saved scan settings. The error was titled "Scan Error" and had the following message: “A problem has occurred and the scan cannot complete.” In version 2.1, you can add additional channels in a scan workflow after starting the scan workflow with saved settings.
The Favorites column has been added to Collections, and you can now mark Favorites in a Collection.
Fixed a bug that would cause a non-functional scan area to be drawn if the right mouse button was accidentally pressed while left-clicking and dragging to draw a scan area.
The Well Format chosen during image acquisition (96-well, 384-well) has been added to the image metadata. For the Odyssey M and Odyssey F, the Slide Orientation set during image acquisition has also been added to the image metadata.
Metadata for images is preserved when zip files are exported from LI‑COR Acquisition Software and imported into Image Studio™ Software or Empiria Studio® Software.
Support for Two More Imagers!
In LI‑COR Acquisition 2.0, you can acquire images with the C‑DiGit Blot Scanner and Pearl Trilogy Small Animal Imaging System!
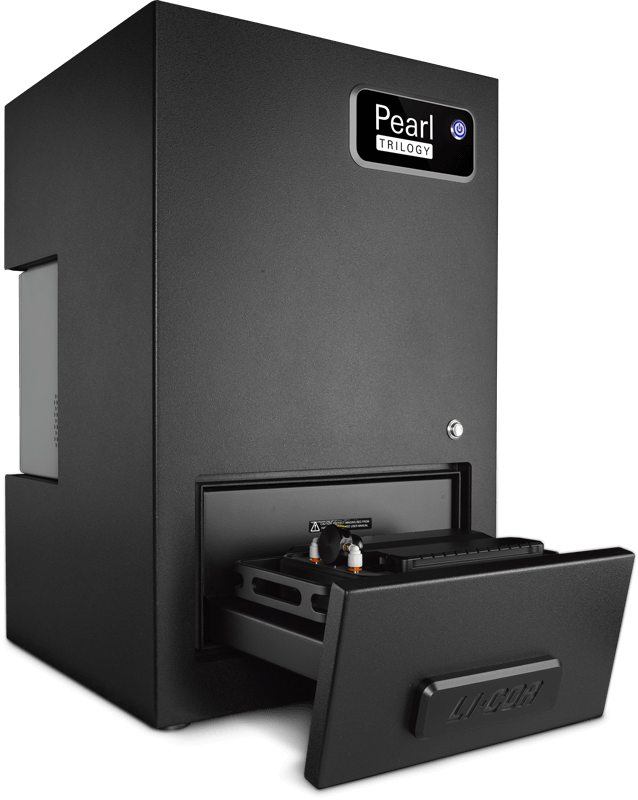
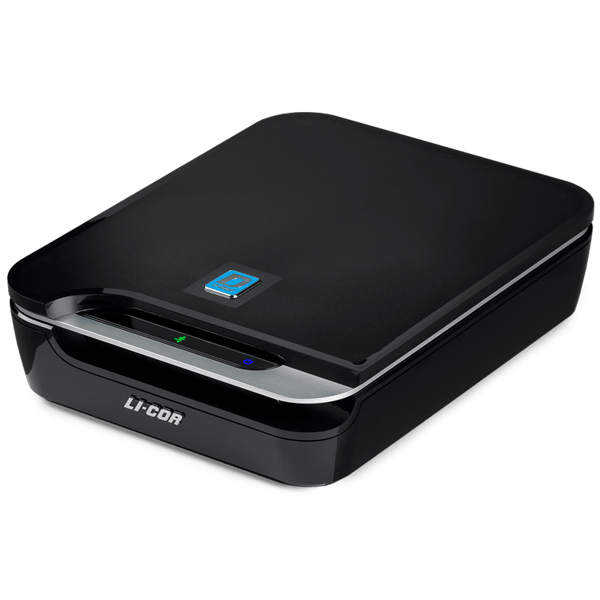
C‑DiGit Blot Scanner
Note: Connect your C‑DiGit to the computer running LI‑COR Acquisition using an Ethernet cable or a suitable USB To Ethernet adapter. Direct USB connection is not supported.
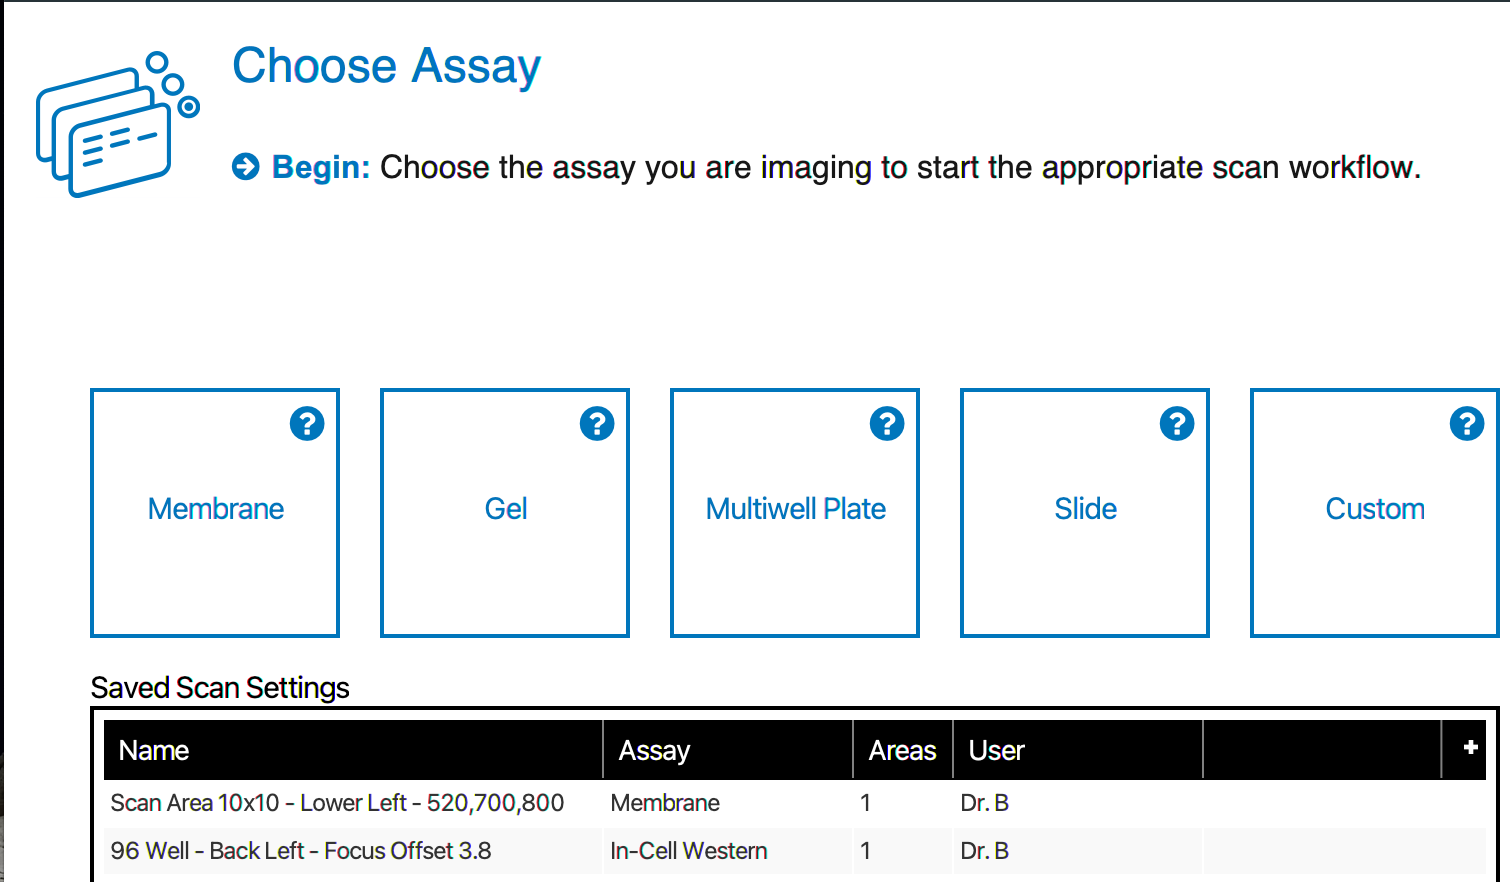
Save Scan Settings
When you're done acquiring images on an Odyssey Imager, click Save Scan Settings to save your settings for easy reuse. When you start another scan with the same imager, select the saved scan settings that you want to use from the Saved Scan Settings list and click Start.
To use exactly the same settings again, click Scan in the left-hand navigation pane.
You can also proceed through the steps by pressing Enter or clicking Next on each step. If needed, you can make adjustments as you step through the worfklow.
Scan settings are saved per Image Data Folder. Go to the Saved Scan Settings page in Options to manage your list of saved scan settings.
Quick-Add Mode for Adding Plate Scan Areas
To quickly scan multiwell plates on the Odyssey DLx Imager or Odyssey CLx Imager, use the new Add Default Scan button to add scan areas that are large enough to acquire images of standard-sized microplates (e.g., 96-well Greiner Bio-One CELLSTAR® Black μClear® Microplate, LI-COR PN 926-19156).
Add "Other" Scan Mode for Custom Image Acquisition on the Odyssey XF Imager and Odyssey Fc Imager
The Other mode provides more flexibility and allows more assay types to be associated with the Odyssey XF Imager and Odyssey Fc Imager.
Image Gallery Enhancements
Delete Multiple Images at a Time
You can now select multiple images at a time in the Image Gallery and delete them with one click.
Use CTRL + Click (⌘ + Click on macOS) or press SHIFT and click to select multiple image acquisitions in the Image Gallery.
Collections
A Collection is a group of image acquisitions. Collections help with organization and managing multiple images at the same time. For example, you can quickly set the display settings for all images in a Collection.

Free Rotate
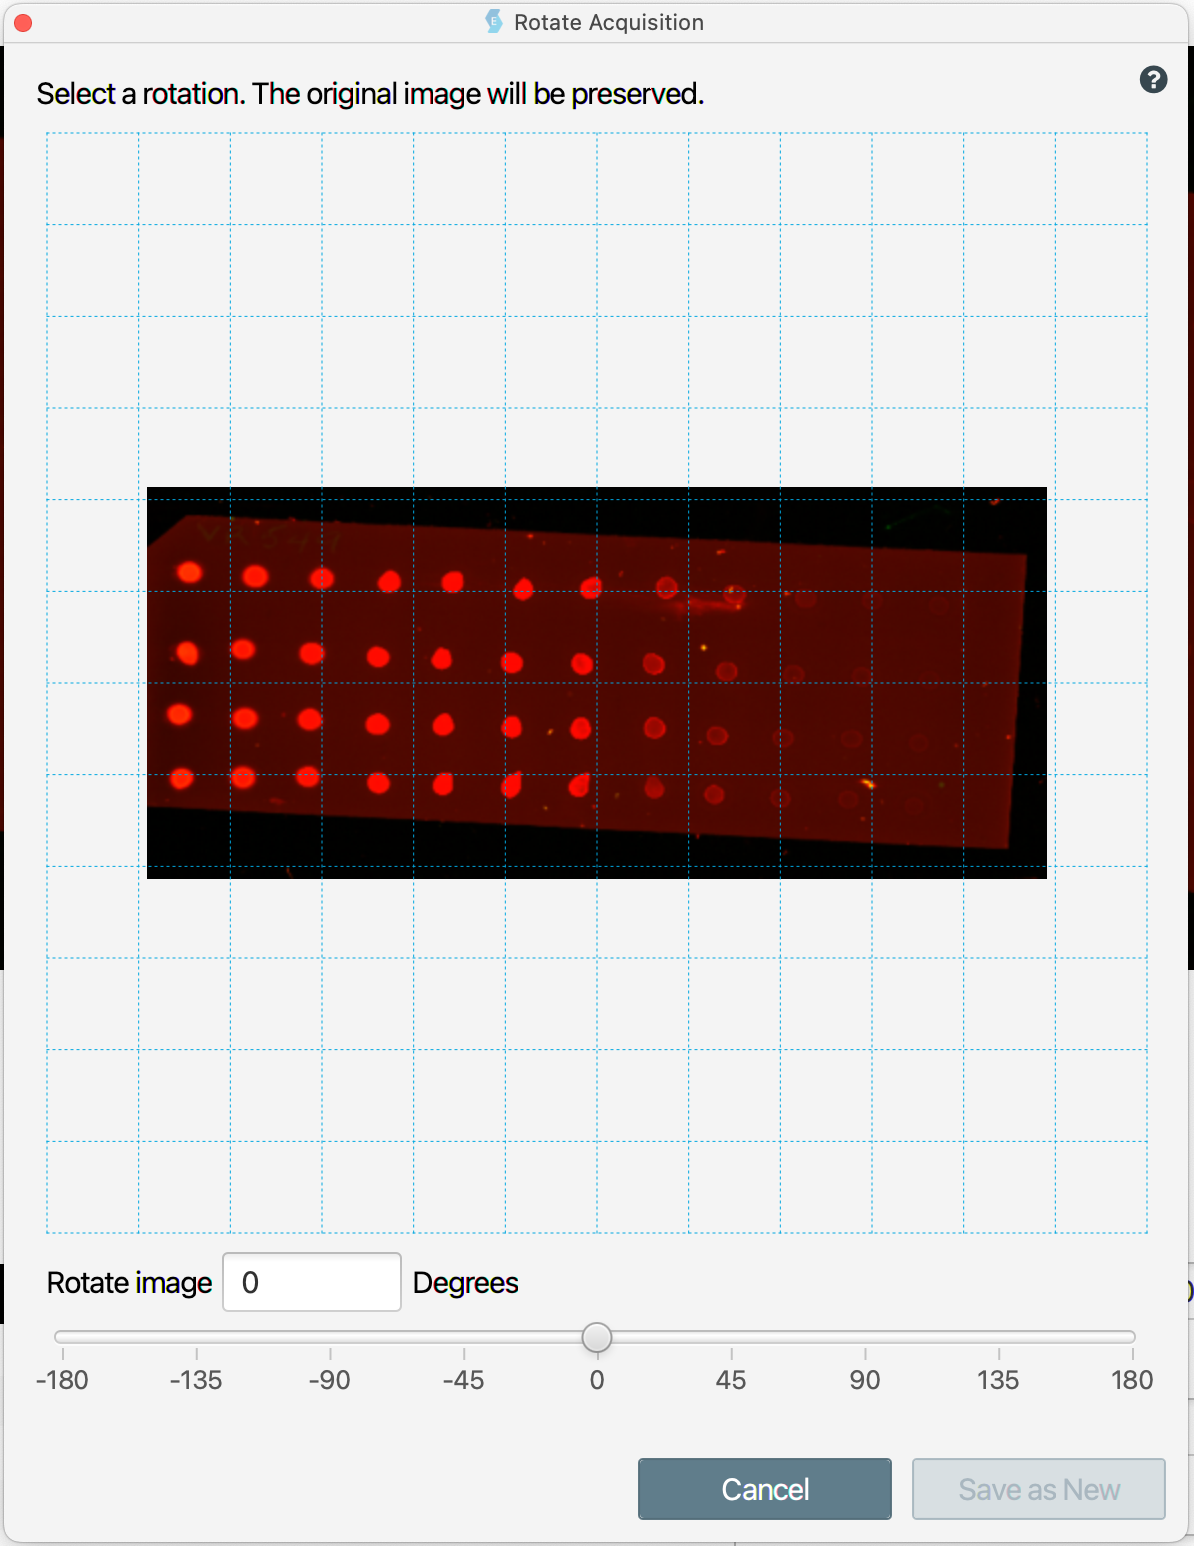
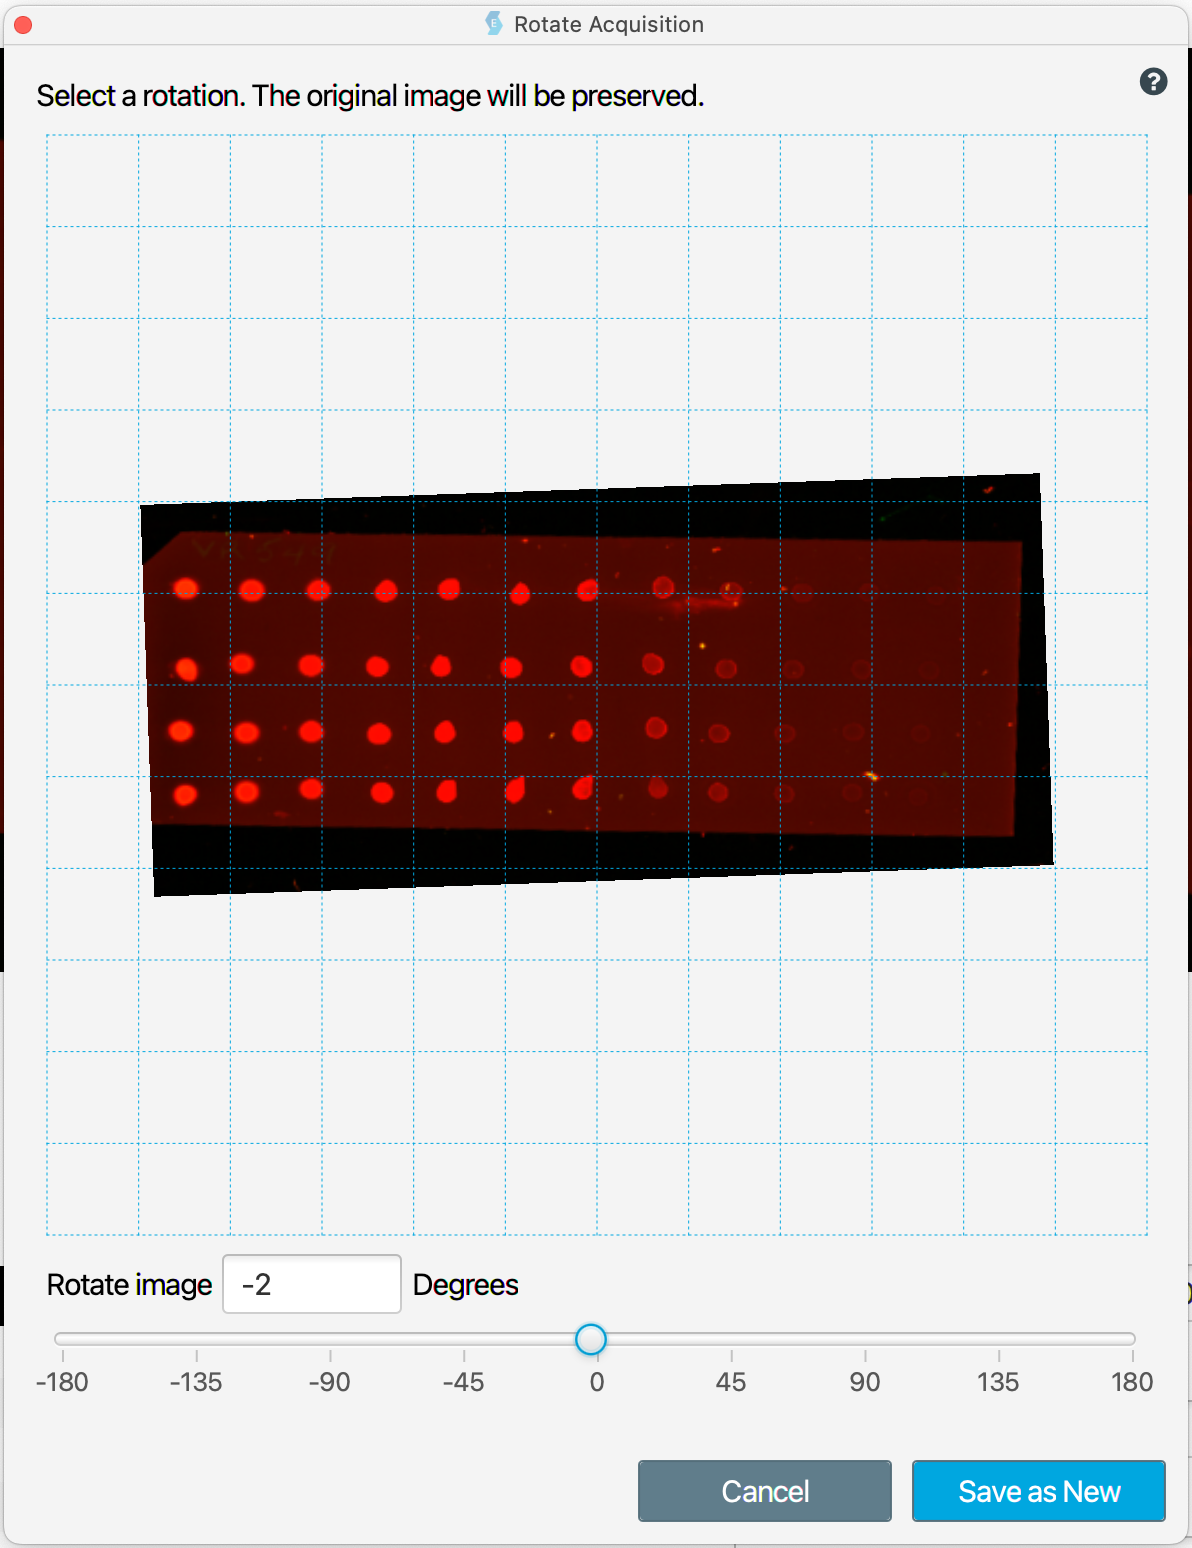
The Image Gallery now has an option to free rotate images. Open an image in the Image Gallery and click Free Rotate to rotate the image to the orientation you need.
Color Bars
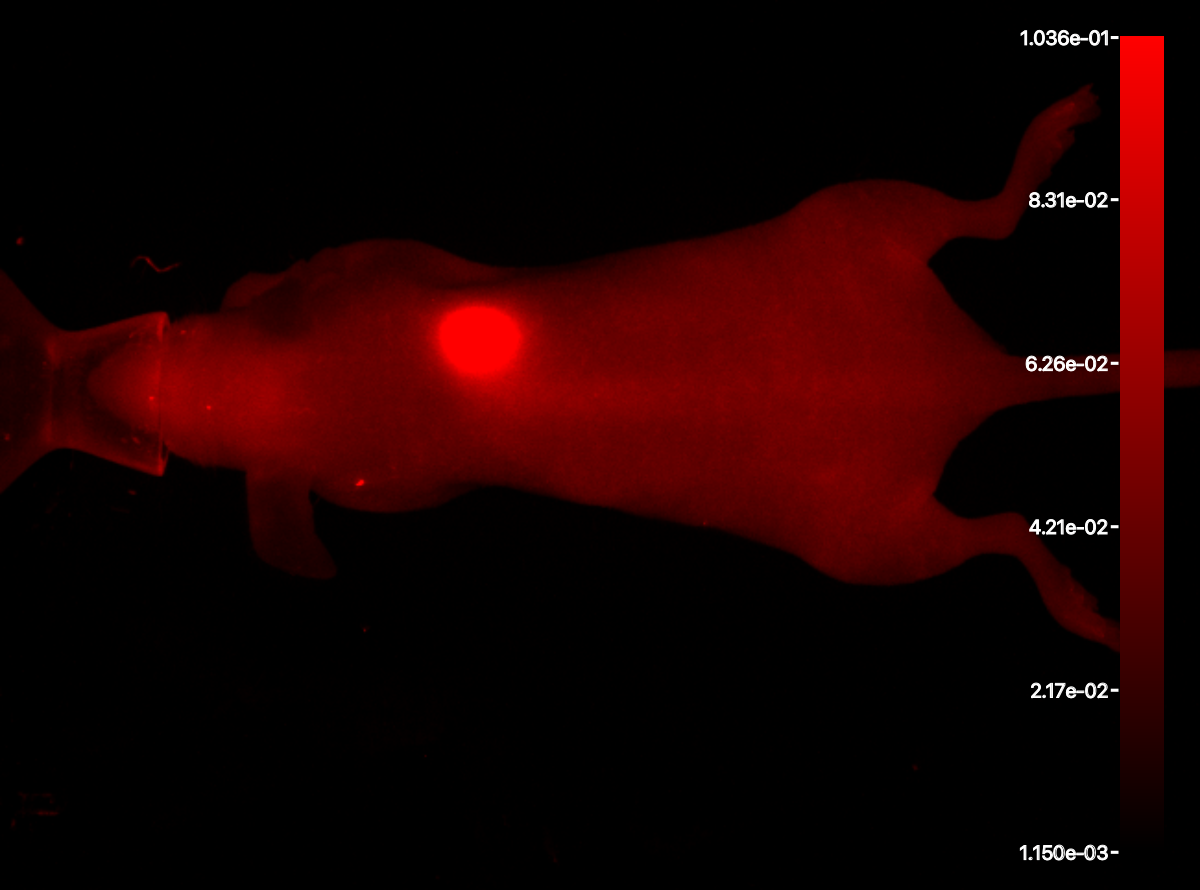
Color bars, also known as color maps, can be displayed (when only one channel is visible) by adding the color bar to the image in the Image Gallery or in an Experiment workflow.
Click to view the color bar. In the Color Bar dialog, select Display on image to display the color bar on the image (when only a single channel is visible).
The color bar can be exported by itself or with the image.
Usernames and Image Data Folders Are Now Associated
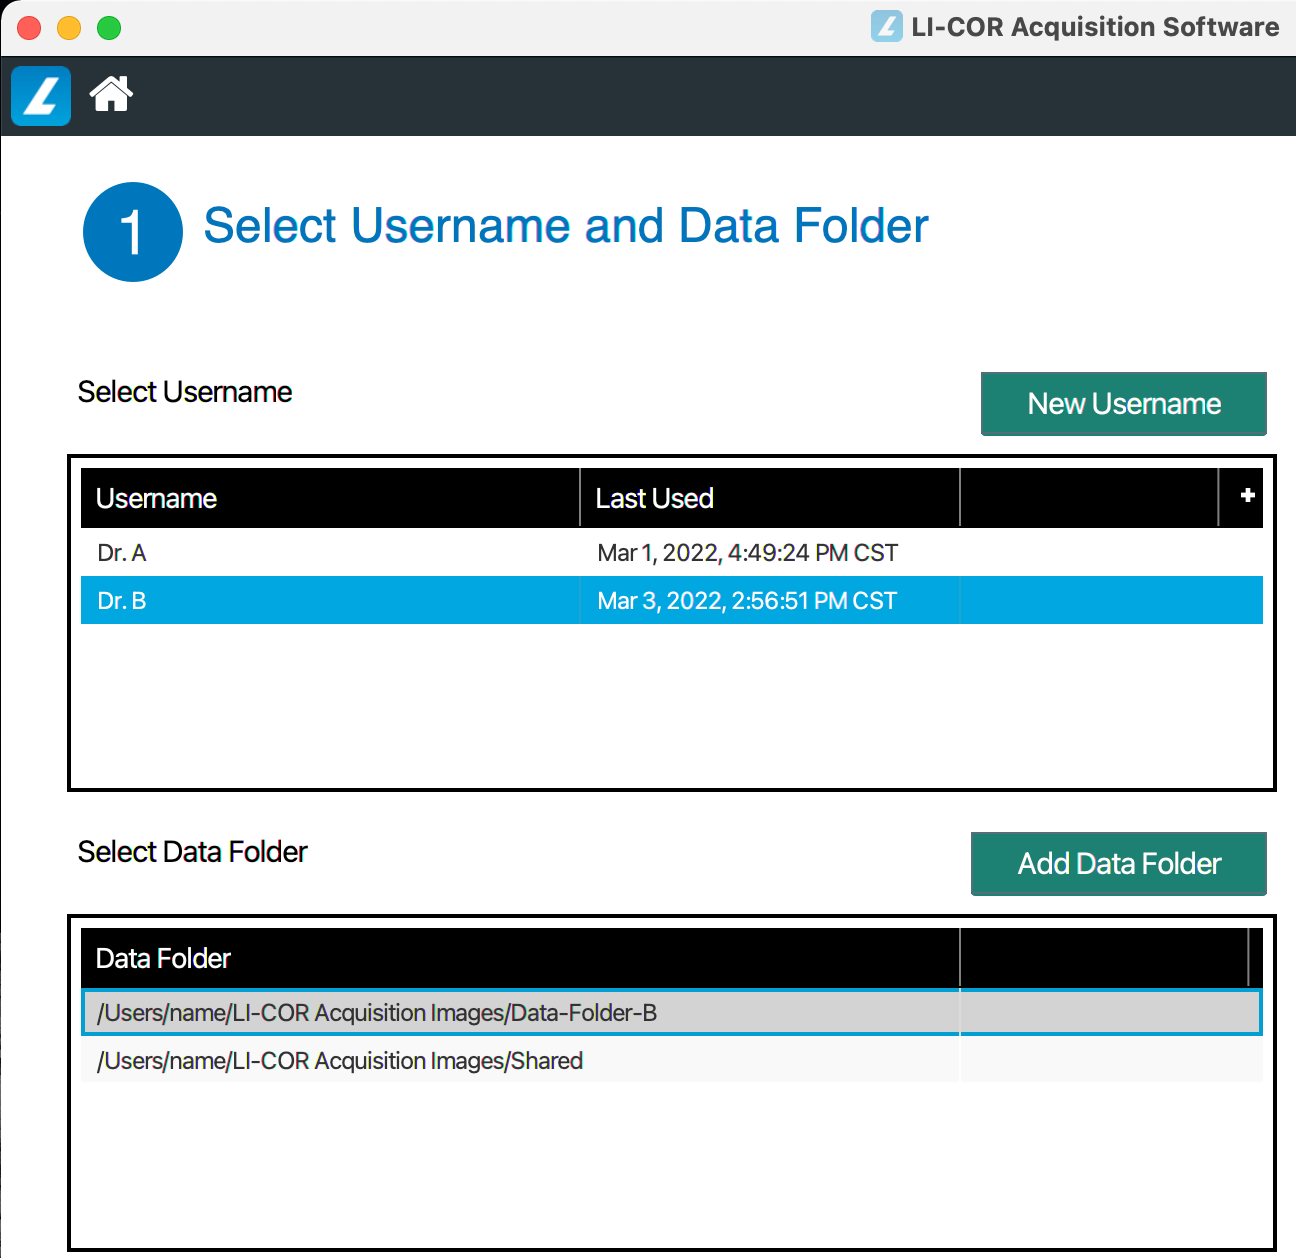
Associating a username and Image Data Folder A folder on your computer's hard drive where internal LI‑COR Acquisition data will be saved. makes it easier to keep your images separate from images acquired by other people in your lab.
To create a new Image Data Folder that is associated with your username, select your username on the Home page, and click Add Data Folder.
See Image Data Folder for more information about creating Image Data Folders.
Once a username and Image Data Folder are associated, you can select the username on the Home page and see a list of Image Data Folders that are associated with that username.
Image Data Folders can be associated with more than one username.
Example
Dr. A's Image Data Folders

Dr. B's Image Data Folders
Rescan
After completing an image acquisition, click Rescan to acquire new image(s) with the same settings.
The Rescan option returns you to the first page of the acquisition workflow. Each page will have settings from the previous scan saved, so just click Next on each page to use the same settings.
Mark Favorites in the Image Gallery
Designate your favorite images in the Image Gallery so that you can easily find them when the Image Gallery list becomes long. See Mark Favorite Image Acquisitions for more information about how to use the new favorites feature.

Batch Export Images for Publication or Presentation
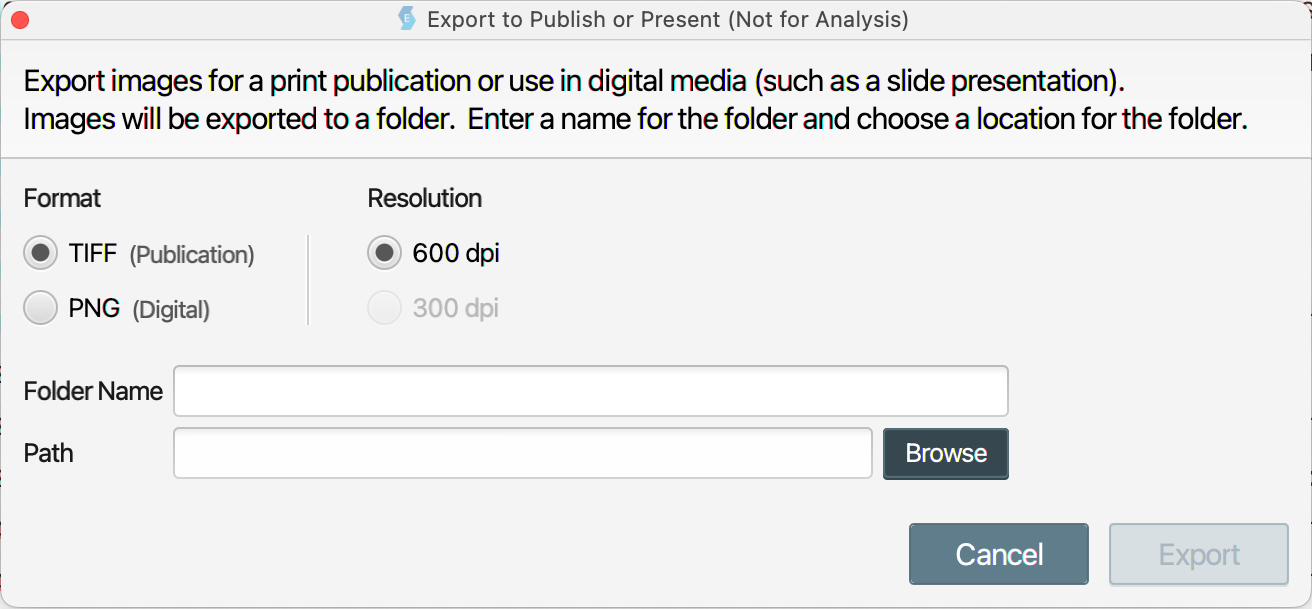
Quickly get multiple images ready for your next slide presentation or publication. Use SHIFT + Click or CTRL + Click to select multiple Acquisitions in the Image Gallery, then click in the export menu. You will see a new dialog with options for exporting all images from the selected Acquisitions.
ELISA Has Been Renamed Absorbance Assay
The assay category previously called ELISA has been renamed to Absorbance Assay.
Export Image Report PDFs
Export image Acquisition(s) and important information about the image Acquisition(s) to a PDF. The provided information includes:
Image ID
Imager Name
Channels
Focus Offset
Acquisition Software Version
Comments
Modifications (e.g., crop, rotate, flip)
Acquire Date and Time
Resolution
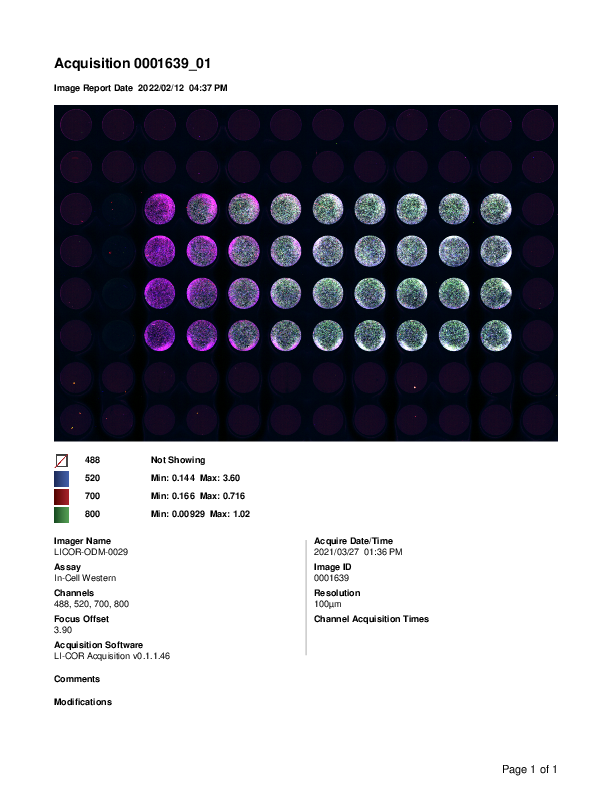
Chemi Area for Plates Labeled
If you connect to an Odyssey M Imager Model 3350 and start a Multiwell Plate > Cell Analysis or In-Cell Western imaging workflow, the first plate area is now labeled 1 - Chemi Area. This label indicates that Plate Area 1 is where plates should be placed to image luminescent, plate-based assays.
Crop by Ratio
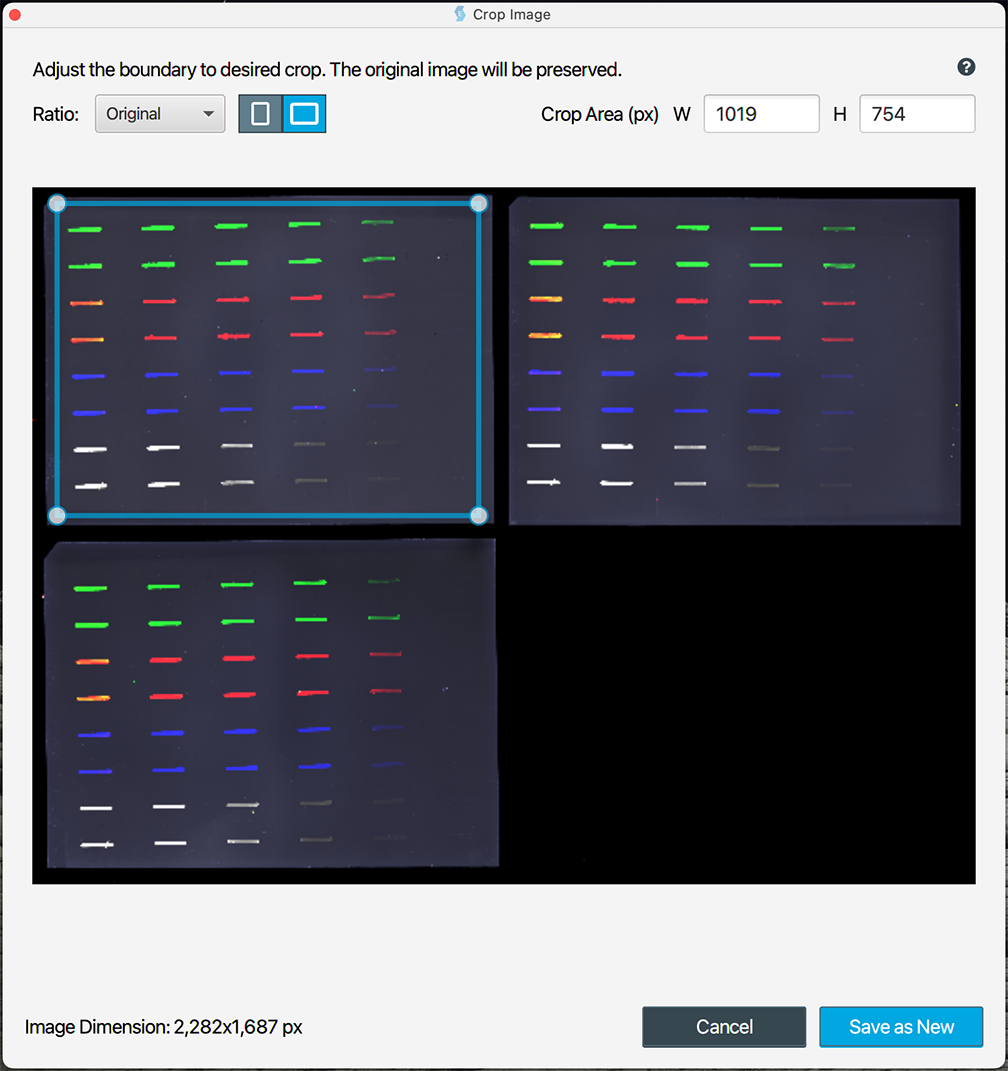
You can now crop an image using a specified aspect ratio.
On the Edit Acquisition page, click Crop.
In the Crop Image dialog, specify the aspect ratio that you want to use.
The Free Form option allows you to modify the width and height of the crop rectangle independently to crop the image to a custom size.
Click the horizontal orientation button
or the vertical orientation button
to choose if the longest dimension is horizontal or vertical.
Crop the image to the size that you need.
The Log4j third-party library has been updated. Although LI‑COR engineers determined that the use of Log4j in LI‑COR Acquisition Software did not constitute a security problem for computers that were not already compromised, LI‑COR Acquisition Software has been updated out of an abundance of caution to use a new version of Log4j that has been updated to protect against recently identified vulnerabilities.
The End User License Agreement (EULA) has been updated in LI‑COR Acquisition Software 1.0.1.
Version 1.0 is the first release of LI‑COR Acquisition Software. Version 1.0 provided functionality for acquiring images from the following LI‑COR imagers: Odyssey CLx Imager, Odyssey DLx Imager, Odyssey XF Imager, Odyssey XF Imager, and Odyssey M Imager.